בשנים האחרונות, מצב כהה הפך לתכונה חיונית עבור יישומי תוכנה רבים, כולל IDEs כמו Eclipse. אם אתה מפתח שמבלה שעות בקידוד ב-Eclipse, האפשרות לעבור למצב כהה יכולה להיות מועילה להפליא. במאמר זה, אנו נדריך אותך בתהליך של הפעלת מצב כהה ב-Eclipse באמצעות תוסף Dark Mode.
מהו Eclipse IDE?
Eclipse IDE, או סביבת פיתוח משולבת, היא פלטפורמת קוד פתוח פופולרית המשמשת מפתחים לפיתוח תוכנה. הוא מספק סט מקיף של כלים לכתיבה, בּוֹחֵן, ואיתור באגים בקוד בשפות תכנות שונות, כולל Java, C/C++, ופייתון.
למה מצב אפל?
מצב כהה צבר פופולריות בקרב משתמשים בשל יכולתו להפחית את עומס העיניים, במיוחד במהלך שימוש ממושך בסביבות עם תאורה חלשה. על ידי הצגת רקעים כהים וטקסט בהיר, מצב כהה יוצר חווית צפייה נוחה יותר ויכול לעזור לשפר את הפרודוקטיביות.
הפעלת מצב כהה ב-Eclipse IDE
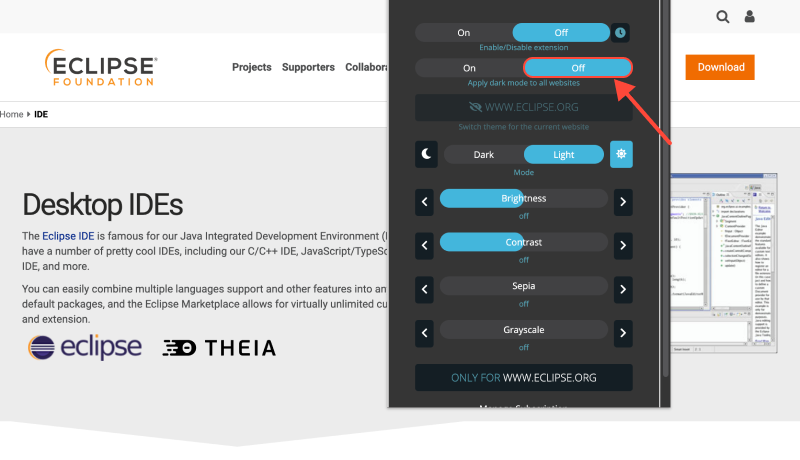
הצעד הראשון הוא התקנת התוסף Dark Mode עבור הדפדפן שלך. תוכל למצוא את התוסף בחנות האינטרנט של Chrome על ידי מעקב הקישור הזה.
לאחר התקנת התוסף, הפעל את Eclipse IDE. נווט לשורת התפריטים ובחר “חַלוֹן” > “העדפות” (אוֹ “לְהַאֲפִּיל” > “העדפות” ב-macOS).
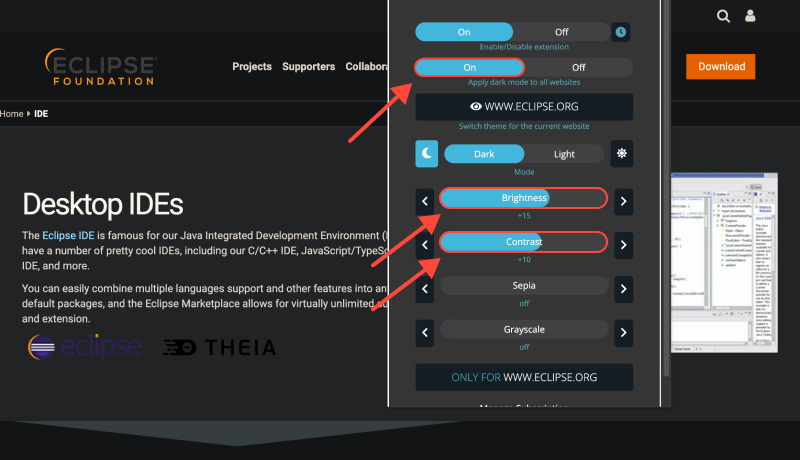
בחלון העדפות, להרחיב את “כְּלָלִי” סעיף ובחר “הוֹפָעָה.” כָּאן, תמצא אפשרויות להתאמה אישית של ערכת הנושא. לִבחוֹר “כֵּהֶה” אוֹ “מצב כהה” מהנושאים הזמינים, ולחץ “לִפְנוֹת” אוֹ “בְּסֵדֶר” כדי לשמור את השינויים שלך.
זהו זה! הפעלת בהצלחה מצב כהה ב-Eclipse IDE. עַכשָׁיו, תהנה מקידוד בסביבה נוחה יותר מבחינה ויזואלית עם מאמץ מופחת בעיניים.
סיכום
מצב כהה הוא תכונה חשובה עבור מפתחים העובדים שעות ארוכות על Eclipse IDE. עם סיומת Dark Mode, אתה יכול בקלות לעבור לערכת נושא כהה יותר ולשפר את חווית הקידוד שלך. נסה את זה היום ותראה את ההבדל בעצמך!